
 VN
VNA standard electrical cable installation process not only ensures the efficient operation of the system but is also a decisive factor in electrical safety. This article will provide detailed guidance on the electrical cable installation process according to current technical standards, helping you understand and apply it correctly in practice.
1. Importance of standard electrical cable installation process
Installing electrical cables is an important step in the construction and maintenance of electrical systems. Adhering to the correct process brings three main benefits:
- Ensuring absolute safety for users. According to statistics from the Vietnam Electricity Authority, approximately 30% of electrical fires and explosions originate from improper cable installation.
- Enhancing the efficiency of the electrical system. Properly installed cables reduce energy loss, extend equipment life, and lower maintenance and repair costs.
- Ensuring legal compliance for construction projects by meeting all safety standards required by the State.

2. Technical standards and related legal regulations
2.1 National standards for electrical cable installation
In Vietnam, electrical cable installation must comply with several important technical standards:
- TCVN 9208:2012 specifically regulates the installation of cables and electrical conductors in construction projects and is the most important reference. This standard outlines requirements for safety distances, installation methods, cable protection, and many other technical parameters.
- TCVN 9207:2012 regulates the placement of electrical conductors in residential and public buildings.
- TCVN 7447 (equivalent to IEC 60364) regulates low-voltage electrical installation systems, including specific requirements for the selection and installation of electrical equipment.
- QCVN 12:2014/BXD on national technical regulations for electrical systems in buildings and public facilities.
2.2 Requirements for cable materials and accessories
Electrical cables need to meet material and construction requirements according to TCVN 5935 (IEC 60502) for PVC-jacketed electrical cables and TCVN 6610 (IEC 60227) for XLPE-insulated electrical cables. Important criteria include:
- Mechanical strength: Cables must withstand tension, bending, and other physical impacts during installation and use.
- Insulation properties: Ensuring insulation resistance meets standards and does not age quickly.
- Fire resistance: Cable jackets need to be flame retardant and not produce toxic smoke in case of fire.
2.3 Regulations on electrical safety and environmental protection
Electrical cable installation work must strictly comply with electrical safety regulations according to Circular No. 31/2014/TT-BCT of the Ministry of Industry and Trade on “National Technical Regulations on Electrical Safety.”
Regarding environmental protection, construction must minimize impact on the surrounding environment, especially for underground cable or high-voltage line installation projects. Waste materials from the installation process need to be collected and processed according to regulations.
3. Standard electrical cable installation process
3.1 Preparation before installing electrical cables
3.1.1 Site Survey
Site survey helps to accurately identify environmental factors that affect the quality and safety of the cable system. Factors to assess include:
- Installation space: Evaluate distances, heights, and widths of installation locations to choose the appropriate construction method.
- Special environmental factors: Such as corrosive atmospheres, risk of flooding, areas with strong magnetic fields, temperature, humidity, etc.
- Identify the location of electrical equipment, electrical panels, outlets, and switches.
Modern measuring tools such as laser distance meters, humidity meters, and electronic thermometers help make surveys accurate and efficient.
3.1.2 Selecting the appropriate cable type
Choosing the right type of cable is a key factor in ensuring a safe and efficient electrical system. Cable selection criteria include:
- Power consumption: Determine the appropriate conductor cross-section based on the total power of the equipment
- Installation environment: Choose the appropriate jacket type (fire-resistant, moisture-resistant, UV-resistant, etc.)
- Purpose of use: Wiring for lighting systems, power, control, fire prevention, etc.
Reference table for selecting conductor cross-section according to design power:
| Power (kW) | Current (A) | Minimum copper wire cross-section (mm²) |
|---|---|---|
| < 1 | < 5 | 1 |
| 1 – 3 | 5 – 15 | 1.5 |
| 3 – 5 | 15 – 25 | 2.5 |
| 5 – 7 | 25 – 35 | 4 |
| 7 – 12 | 35 – 60 | 6 |
| 12 – 20 | 60 – 100 | 10 |
3.1.3 Preparing tools, construction equipment and skilled personnel
A complete set of tools will help the construction process proceed smoothly and safely, including:
- Basic tools: Wire cutters, wire strippers, screwdrivers, voltage testers, drills, hammers, screws, nails, etc.
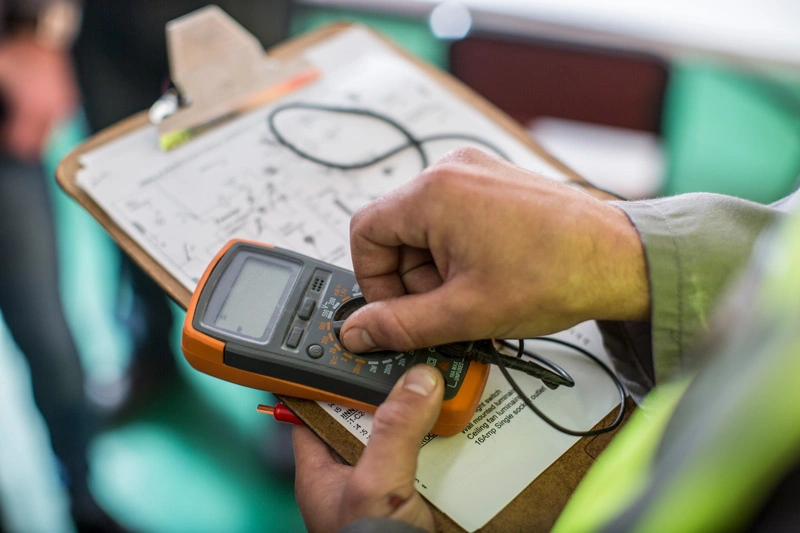
- Testing equipment: Multimeters, clamp meters, insulation resistance meters (megaohm)
- Safety equipment: Insulating gloves, protective shoes, safety helmets
- Special equipment: Hydraulic terminal crimpers, fiber optic cable welders (if applicable), pipe conduit inspection cameras
Personnel involved need to be properly trained in electrical techniques and occupational safety, with a clear understanding of relevant processes and standards.
3.2. Installing cable trays and conduits
3.2.1. Installing cable trays
Cable trays are a common solution for wiring in industrial and commercial buildings. Cable tray installation steps include:
- Determining positions: Mark the position of cable trays according to design drawings, ensuring appropriate height and convenience for future maintenance.
- Securing cable trays: Use support brackets or hanging rods to secure cable trays to walls or ceilings. The distance between fixing points should be 1-1.5m for horizontal trays and 0.8-1m for vertical trays.
- Installing accessories: At direction change points, use accessories such as elbows, tees, and crosses to ensure cables are not bent excessively.
- Connecting cable trays: Use dedicated connecting bars, ensuring connections are secure and have no sharp edges that could damage cable jackets.
3.2.2. Installing conduits
Conduits are commonly used for residential buildings or when cables need protection from strong mechanical impacts. The installation process is as follows:
- Choosing the appropriate conduit type: PVC pipes for dry areas, galvanized steel pipes for areas with fire or explosion risks or requiring high mechanical strength.
- Positioning and securing conduits: Place conduits according to design routes, use pipe clamps to secure them to walls or ceilings at 0.8-1m intervals.
- Handling bend points: At bending points, use dedicated pipe benders to create appropriate curves (minimum radius equal to 10 times the pipe diameter) to avoid pipe kinking.
- Connecting pipes: Use pipe joints, ensuring tight connections with no gaps that could snag wires during threading.
Important note: The inner diameter of the conduit should be at least 30% larger than the total diameter of the cables to be threaded through, to ensure ease of threading and good heat dissipation.
3.3 Pulling and threading electrical cables
3.3.1. Preparation before threading cables
Before starting to thread cables into cable trays or conduits, several preparatory tasks need to be performed:
- Inspect cables visually, ensuring there is no damage
- Position cable reels appropriately, convenient for cable pulling
- Prepare guide wires (usually nylon or flexible steel wire) for pre-threading
3.3.2. Techniques for threading cables through conduits
When threading cables through conduits, implement the following techniques:
- Using guide wires: Thread the guide wire through the conduit first, then secure the cable to the end of the guide wire.
- Lubricating cables: If necessary, use dedicated lubricants to reduce friction when threading cables through long conduits.
- Pull cables gradually: One person pushes the cable into the conduit entrance, another pulls the guide wire at the exit, ensuring even pulling force without jerking.
- Mind tension limits: Do not tension cables excessively to avoid damaging conductors or insulation layers.
3.3.3. Arranging cables in cable trays
When laying cables in cable trays, follow these principles:
- Avoid overloading: The total cross-sectional area of cables should not exceed 40-50% of the tray's cross-sectional area to ensure good heat dissipation.
- Arrange in an orderly manner: Lay cables horizontally, avoid overlapping that could cause difficulties for future maintenance.
- Differentiate cable groups: Group cables by function (power, control, signal) and place them in different positions within the tray.
- Secure cables: Use ties or plastic straps to secure cables to the tray at direction change points and at approximately 1.5-2m intervals on straight sections.


3.4. Proper cable connection techniques
3.4.1 Cable end preparation
Complete the following preparatory steps:
- Strip insulation to a length appropriate for the connection method
- Clean the conductor surface, removing oxides and impurities
- For multi-strand wires, twist the small strands tightly before making connections
3.4.2 Selecting and implementing appropriate connection methods
Depending on the cable cross-section and purpose, one of the following methods can be applied:
- Soldering method: Applied for connections requiring high durability, especially for small cross-section wires (≤ 6mm²).
- Terminal crimping method: Applicable for all cable cross-sections.
- Screw connection method: Using connectors or terminal blocks.
- Twist and tape method: This method should only be applied to small cross-section wires not carrying heavy loads.
After making the connection, wrap the joint with electrical tape or heat shrink tubing to ensure safety and long-term durability.
3.5. Securing and fastening cables
3.5.1 Securing cables on ladders and cable trays
For cables laid on ladders or cable trays, proper securing ensures safety and extends cable life:
- Cable fastening intervals: Cables should be tied to trays or ladders at the following intervals:
- Approximately 3-4.5m on horizontal sections
- Approximately 1-1.2m on vertical sections
- At each direction change point
- Cable tie materials: Use UV-resistant plastic ties or plastic-coated ties to avoid damaging cable jackets.
- Appropriate tightening force: Tighten enough to prevent cable movement but not so tight as to deform the cable jacket.
3.5.2. Handling at bend points
Cable bend points need special treatment to avoid damaging cables:
- Minimum bending radius:
- For single-core cables: ≥ 15 times the cable diameter
- For multi-core cables: ≥ 12 times the cable diameter
- Securing before and after bends: Ensure cables are securely fastened at both ends of the bent section.
- Avoid repeated bending: If possible, limit bending the cable multiple times at the same location.
3.6 Testing and acceptance of the system
After installation is complete, testing and acceptance are crucial steps to ensure the system meets all technical requirements:
- Visual inspection
- Assess the external condition of cables, check for jacket damage
- Check the security of fastening points and connections
- Confirm that marking and labeling have been completed properly
- Continuity testing and phase identification
- Use a multimeter to check continuity
- Identify phases, neutral, and ground wires correctly using a voltage tester or specialized equipment
- Insulation resistance measurement
- Use an insulation resistance meter (megaohm) with appropriate test voltage
- Minimum insulation resistance value: According to TCVN 9208:2012, this value should not be less than 0.5 MΩ.
- Load testing
- Operate the system at rated load
- Measure cable temperature after operating time (should not exceed allowed values)
- Check voltage drop on the line (should not exceed 5% of rated voltage)
After completing the inspection steps, create an acceptance report with complete measurement parameters and signatures from all related parties.
4. Occupational safety notes in electrical cable installation
To ensure safety, installers need to follow these principles:
4.1 Personal protective equipment
Personal protective equipment is the final layer of protection and essential for electrical installers:
- Insulating gloves: Must meet insulation standards corresponding to the working voltage level
- Insulating shoes: Thick rubber soles with no nails or metal parts
- Safety helmet: Impact-resistant and electrically insulated
- Safety glasses: Protect eyes from electric arcs and fragments
- Insulated tools: Screwdrivers, pliers, and other tools must have appropriate insulation
4.2 Electrical safety regulations during installation
Electrical safety regulations must be strictly followed:
- Power cut-off principle: Before working with wiring systems, power must be cut off, the circuit breaker locked, and warning signs posted: “Under repair – Do not turn on power”
- Confirm power absence: Use a voltage tester to verify that power has been cut off before contact with conductors
- Protective grounding: For high-voltage lines, temporary grounding must be implemented at the work location
- Working in teams: For high-voltage electrical systems, always work in teams of at least 2 people, with one working and one supervising safety
5. Frequently asked questions (FAQs) about electrical cable installation process
5.1 How to know if electrical wires have been installed correctly?
To evaluate whether a cable system has been installed correctly, you need to check the following factors:
- Cables are not under tension: Cables should have a slight sag or be threaded through conduits with appropriate slack
- Connections are well-insulated: No bare wires exposed, connections covered with electrical tape or heat shrink tubing
- Cables are securely fastened: Not loose or shaking when touched
- Electrical parameters meet requirements: When tested, insulation resistance and contact resistance are within permissible limits
- No abnormal heating: When operating at rated power, cables do not get abnormally hot
5.2 What are common mistakes when installing electrical wires?
During the electrical cable installation process, some common mistakes to avoid:
- Using cables with cross-sections smaller than required, leading to overload and heat generation.
- Bending cables excessively, causing insulation cracks and potentially breaking conductors.
- Installing cables in environments that are too harsh, causing rapid aging of the insulation.
- Not using conduits when running wires through walls or floors: Leading to risk of cable damage due to friction or mechanical impact
- Mixing cables of different cross-sections: Especially at connection points, causing hot spots and energy loss
5.3 What is the regulation for the depth of underground cable burial?
Protective troughs and metal cable jackets should be placed at least 1.2m deep at points where cables must withstand pressure from traffic and heavy objects. This depth will be 0.6m at other points. Simply put, the depth of buried electrical cables needs to range from 0.6 to 1.2m.
6. Conclusion
Standard electrical cable installation requires following processes from survey, selecting appropriate materials to installation and testing. For students, engineers, and technicians new to the profession, thoroughly understanding and correctly applying the installation process not only helps avoid risks but also builds a solid professional foundation, bringing long-term economic benefits through reduced maintenance and repair costs and energy savings.

